Install and config the WooCommerce plugin
WooCommerce is a popular open-source e-commerce plugin designed to work with WordPress, a popular content management system (CMS). It allows users to easily create and manage online stores, selling physical and digital products, and accepting payments via a variety of payment gateways.
WooCommerce is highly customizable and offers a wide range of features, including product management, inventory management, tax and shipping options, customer management, and various marketing tools. It also supports a large number of extensions and integrations, enabling users to add additional features and functionality to their online stores.
Here you’ll find how to install and setup the plugin to integrate 4Geeks Payments on your WordPress/WooCommerce instance.
Install the plugin
Info
Need to install the WooCommerce plugin manually? Find the source right on the official Wordpress repository.
I’m assuming that you already have the WooCommerce installed on your Wordpress instance. To install the 4Geeks Payment for WooCommerce plugin please follow the next steps:
- Go to the login page of your WordPress website and enter your login credentials to access the dashboard.
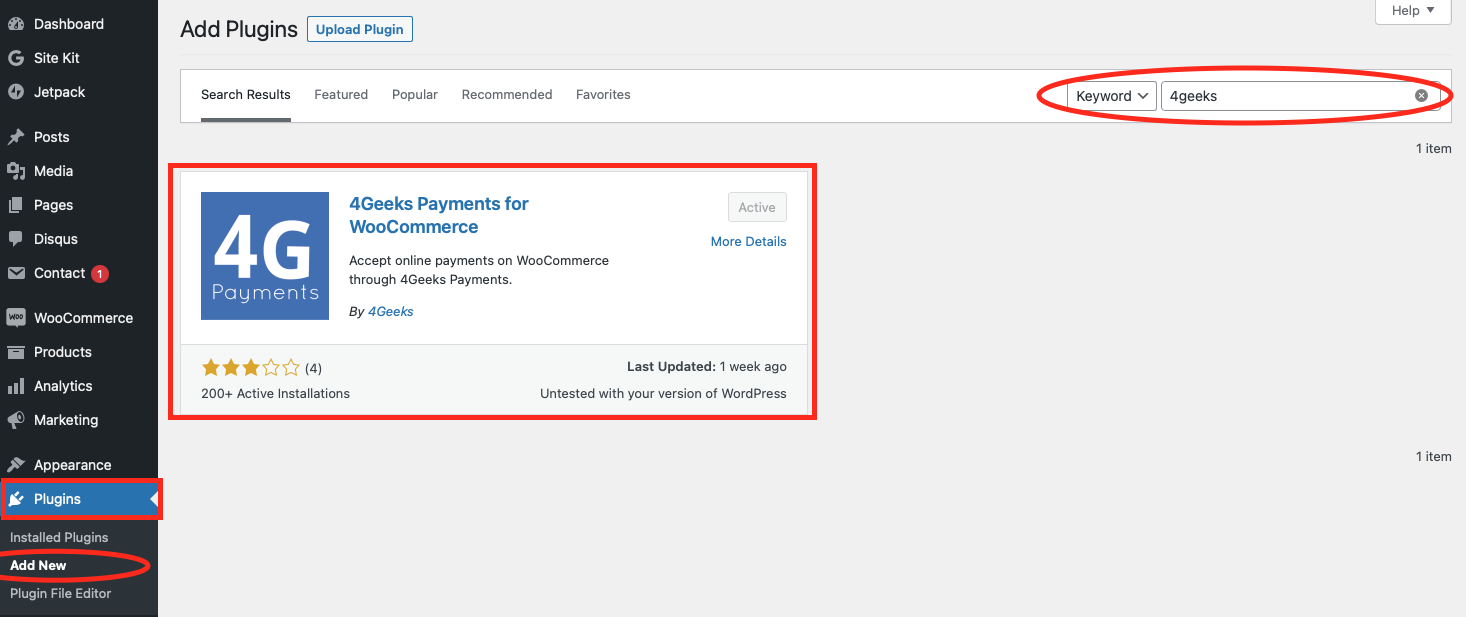
- In the left-hand menu of the WordPress dashboard, click on the “Plugins” option.
- From the “Plugins” page, click on the “Add New” button at the top of the page.
- Search for the plugin by typing “4Geeks”.
- Once you find the plugin you want to install, click on the “Install Now” button.
- After the plugin is installed, click on the “Activate” button to activate the plugin.

Setup the plugin
Once the plugin is installed and activated, you need to link it to your merchant account. So follow the next steps:
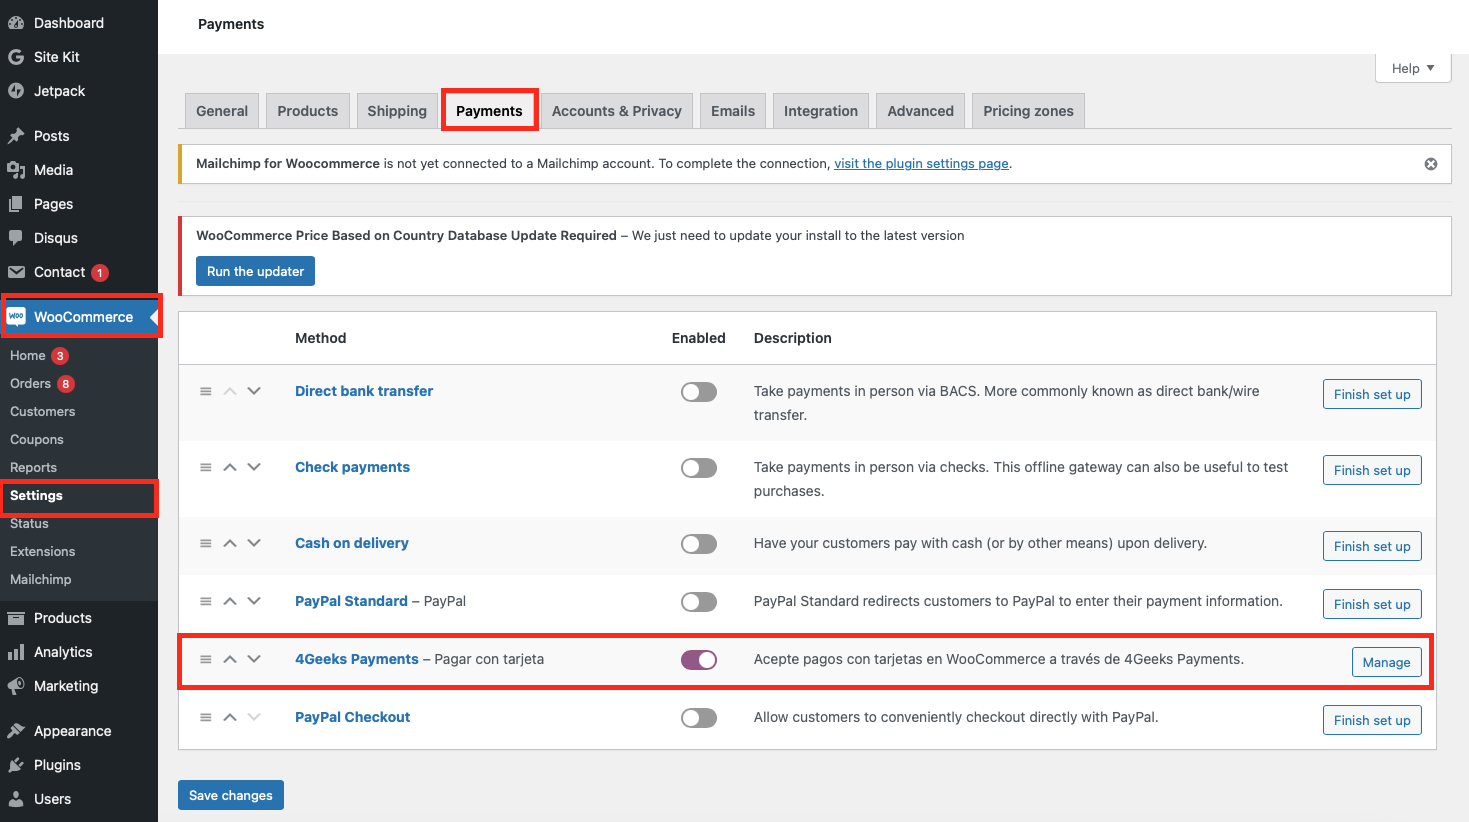
- On Wordpress, go to “WooCommerce” -> “Settings” -> “Payments”.
- Click on “4Geeks Payments” plugin from list.

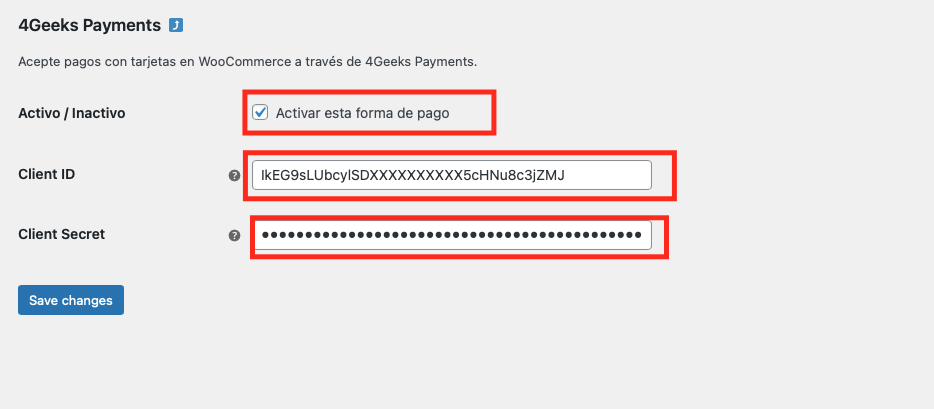
- Copy the Client ID and Client Secret from Console (Settings -> API Keys), and paste it on the plugin configuration.
- Click on “Save changes”.
- That’s it.
